This article provides guidance on how to add multiple users to a Microsoft 365 tenant via the Admin Center portal. The article appears also in my podcast and Youtube channel.
You can view this article as a how-to video on Youtube.
Case #
In this how-to article we will show you how to add multiple users to a Microsoft 365 tenant via the Admin Center portal.
Solution #
To add multiple users to a Microsoft 365 tenant via the Admin Center portal, go through the following steps.
- Navigate with your Web browser to https,admin,dot,microsoft,dot,com. [sPause sec=1 ePause]
- On the left pane, click on "Users", then click "Active Users". [sPause sec=1 ePause]
- Under the "Active Users" section on the main area, click on "Add multiple users". [sPause sec=1 ePause]
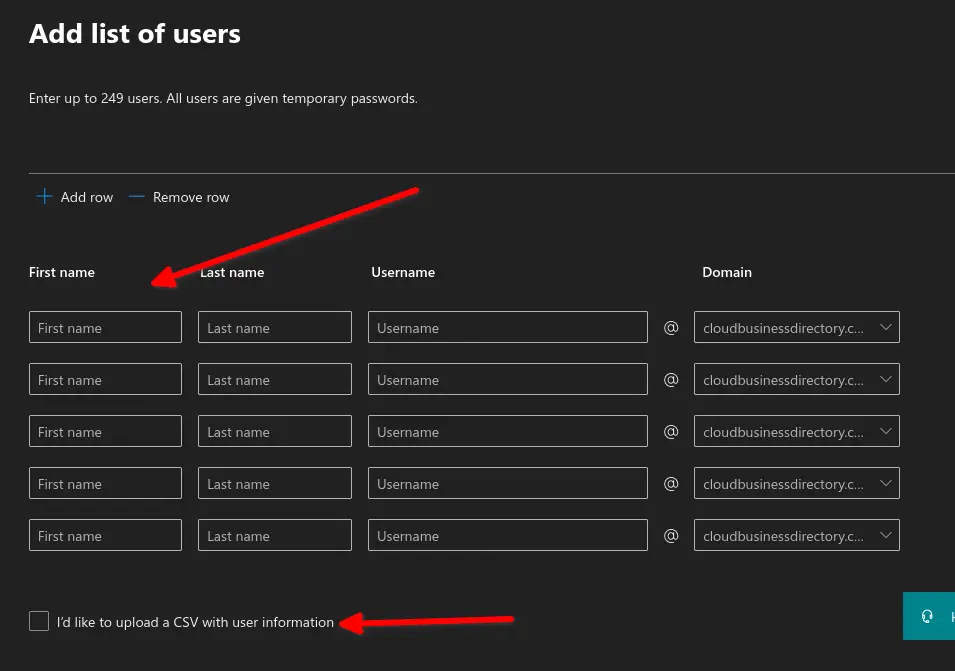
- You can either add users manually in bulk by using the user interface of the "Add list of users" screen or you can upload a CSV file which should be prepopulated with your list of users.
From this point onwards you have two options.
Option 1 #
In the "Add list of users" screen, fill-in the first name, last name, username and domain for each user. Add or remove rows as needed and then click Next.
Provide a location and license for your users or choose to not assign a license at this point.
Leave the Apps features in their default selections and click Next.
On the "Review and finish adding multiple users" screen, review your selections and click "Add users". Your users should be shown under the "Active Users" section.
Option 2 #
On the "Add list of users" screen, instead of filling-in one row per user to be added, tick the "I would like to upload a CSV with user information" checkbox and pay attention to the "Avoid common errors" section.
Click on "Download a CSV file that includes example user info.
Edit this CSV file and add the users you wish to add. Remember that a maximum of 249 users are allowed per CSV file.
Click "Browse" and choose the csv file you have prepared. Click "Next" to continue.
Provide a location and license for your users or choose to not assign a license at this point.
Leave the Apps features in their default selections and click Next.
On the "Review and finish adding multiple users" screen, review your selections and click "Add users". Your users should be shown under the "Active Users" section.
Subscribe to the Cloud Computing Youtube Channel to be notified of upcoming how to videos.


