This article provides guidance on how to troubleshoot Exchange Online NDR errors. The article is available in my podcast and Youtube channel. View this article as a how-to video on Youtube.
Case #
In this how-to article, we will show you how to create a new Microsoft 365 user from within the Microsoft 365 Admin Center.
Solution #
Go through the following steps.
- Open your Web browser, navigate to https://admin.microsoft.com and login by using your administrator credentials.
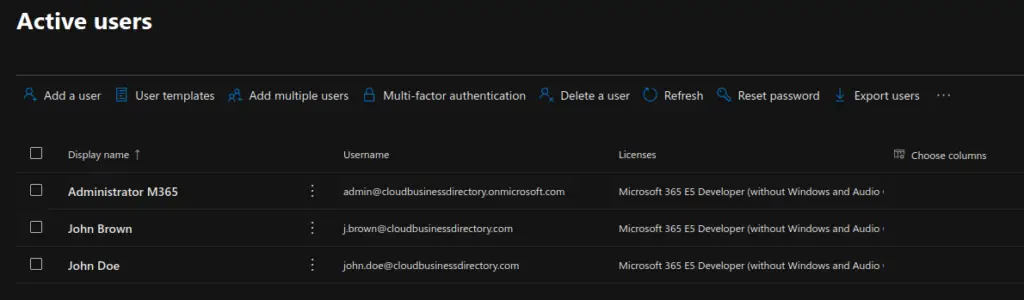
- On the left hand side pane, click on Users, then Active Users. This will populate the list of available users on the main screen.
- To add a single user, click on the "Add a user" button on the top of the page, underneath the "Active Users" label.
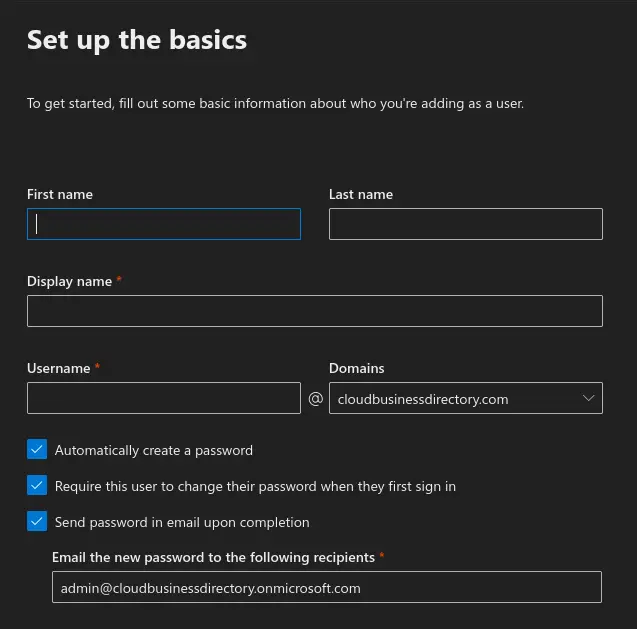
- On the "set up the basics" page, fill-in the first name, last name, display name, username and domain for the new user. Also decide which checkboxes to check and more specifically choose the following:
a. Automatically create a password. Tick this option if you need the Microsoft 365 admin center to automatically allocate a new temporary password to the new user.
b. Require this user to change their password when they first sign in. This is highly recommended, as you would normally expect that the user(s) change the temporary password which you initially send to a strong password only they will know.
c. Send password in email upon completion. Combined with the previous checkbox, this is the most secure option, since you would not have to share the temporary password over any other non-secure means. Enter the email address to which the new password will be sent in the generated text box. - After having filled-in all required information, click on Next to continue.
- On the "Assign product licenses" page, select the user location and choose whether a Microsoft 365 license will be assigned to the user by ticking the appropriate checkbox or if the user will be created without a product license.
- Click Next to continue.
- On the optional settings page, choose whether the new user will have any additional Microsoft 365 roles and fill-in any additional user profile information if you wish to.
- Click Next. This will lead you to the "Review and finish" page. Review all user information and click "Finish adding". Your new user should now appear in the Microsoft 365 Admin Center "Active Users" homepage.
Subscribe to the Cloud Computing Youtube Channel to be notified of upcoming how to videos.


