Case #
You have a Linux-based KVM installation and you need to deploy Cloudstack latest version to control your KVM hypervisor and virtual machines. This article provides high-level guidance on how to deploy Cloudstack on Ubuntu Linux.
This article is being updated to include more detailed steps for configuring all aspects of Cloudstack deployment on Ubuntu Linux. Bear in mind that this post assumes 14.6.1.0 version of Cloudstack. You should always consult the latest documentation from the official Cloudstack website. See the references section of this post for details.
Solution #
The Cloudstack (CS) management server can be installed on any supported Linux distribution, including the following:
- Ubuntu 18.04 LTS, 20.04 LTS
- CentOS versions 7, 8 (note: CentOS 8 will EOL in Dec 2021)
- Rocky Linux 8
- RHEL versions 7, 8
- openSUSE Leap 15
- SUSE Linux Enterprise Server 15 (not tested, but expected to work same as with openSUSE 15)
The CS management server can be a physical server or a virtual machine running on any supported hypervisor. CloudStack supports three hypervisor families, XenServer with XAPI, KVM, and VMware with vSphere. More details about supported operating systems and hypervisors can be found in the official Cloudstack compatibility matrix at: https://docs.cloudstack.apache.org/en/latest/releasenotes/compat.html.
The installation plan followed in this guide assumes that you have a minimal environment of a single Ubuntu Server LTS 20.04, which is a physical machine running the KVM hypervisor. This means that the underlying networking and storage requirements are very basic. In case you have a production environment with a more complex and redundant architecture, you will need to consult the official Apache documentation to ensure that you have configured all pre-requisites. Refer to the following article for step-by-step instructions on how to deploy KVM on an Ubuntu Server:
https://stefanos.cloud/kb/how-to-install-kvm-in-ubuntu-linux.
Minimum installation requirements #
First and foremost, review the Cloudstack installation requirements for the management and databse server, the hypervisor machine(s) and the Cloudstack package repositories at . One of the most important pre-deployment considerations is that when you deploy CloudStack, the hypervisor host must not have any VMs already running.
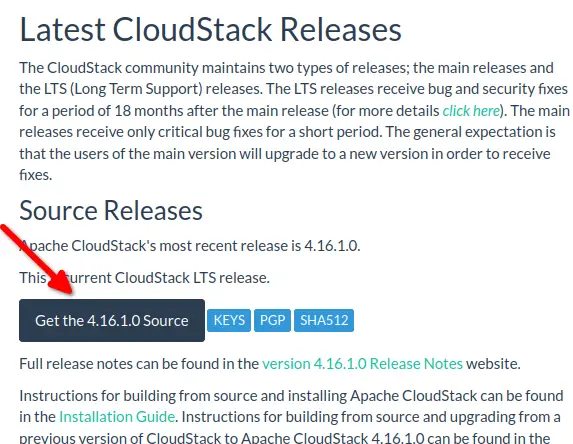
Download Cloudstack #
Download the Cloudstack packages from https://cloudstack.apache.org/downloads.html. They are available as either source code or binaries. For the Cloudstack source code, you need a file ending in tar.bz2, as well as a PGP/GPG signature, MD5, and SHA512 file. The tar.bz2 file contains the bzip2-compressed tarball with the source code.
After downloading, verify the integrity of the source files. The PGP signature can be verified using PGP or GPG. First download the KEYS as well as the PGP asc signature file for the relevant distribution.
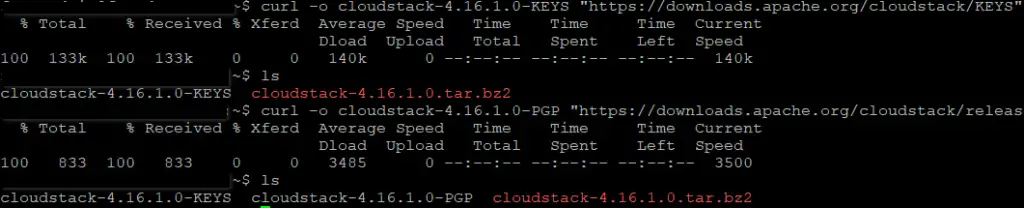
After having downloaded the above files, proceed with integrity verification. Import the keys file and check against the PGP ASC file and SHA512 hash.
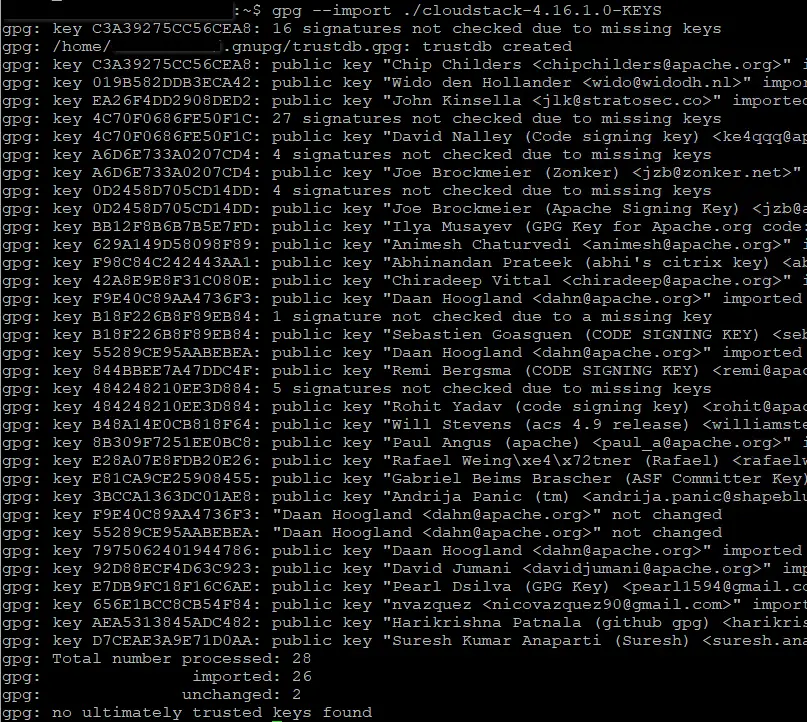
gpg --verify ./cloudstack-4.16.1.0-PGP
gpg --print-md SHA512 ./cloudstack-4.16.1.0-src.tar.bz2 | diff - ./cloudstack-4.16.1.0-SHA512
Download and deploy Cloudmonkey #
Apache CloudStack's CloudMonkey tool is a CLI and shell environment designed for interacting with CloudStack-based clouds. You can download the binaries from https://github.com/apache/cloudstack-cloudmonkey/releases. Installation instructions are available at https://github.com/apache/cloudstack-cloudmonkey/wiki/Getting-Started#installation. Cloud Monkey can be deployed on a separate machine with network access to the Cloudstack management server or on the KVM server itself.
Deploy the Cloudstack management server #
The management server can be deployed as a physical or virtual server on a supported Linux distribution and should be the first VM to be deployed. Afterwards any VMs to be managed by Cloudstack should be created from within the Cloudstack portal.
The assumption in the demo is that the CS management server, the MySQL database server and the NFS shares (primary and secondary) are all hosted on the same machine (CS management server). A production environment should definitely have redundancy for the individual components. Details about deploying the Cloudstack management server can be found at: https://docs.cloudstack.apache.org/en/4.16.1.0/installguide/management-server/index.html.
The following commands should be executed on the CS management server bash shell.
#Confirm internet connectivity
ping cloudstack.apache.org
sudo apt-get install chrony
sudo vi /etc/apt/sources.list.d/cloudstack.list
#Add the following line to the cloudstack.list file above
deb http://download.cloudstack.org/ubuntu focal 4.16
wget -O - http://download.cloudstack.org/release.asc |sudo apt-key add -
sudo apt-get update

#Install the CS management server and its dependency packages
sudo apt-get install cloudstack-management
#Install the MySQL server and its dependency packages
sudo apt-get install mysql-server
#Add the following lines to your MySQL configuration file
sudo vi /etc/mysql/mysql.conf.d/mysqld.cnf
server-id=1
innodb_rollback_on_timeout=1
innodb_lock_wait_timeout=600
max_connections=350
log-bin=mysql-bin
binlog-format = 'ROW'
The MySQL configuration files available in an Ubuntu 20.04 LTS system are the following.

Continue with the following Bash commands on the CS management server terminal.
sudo systemctl restart mysql
#If you run into any issues with the MySQL service, the relevant log is
sudo less /var/log/mysql/error.log
sudo grep "error\|exception" /var/log/mysql/error.log

#Setup the MySQL databases for CS
cloudstack-setup-databases cloud:{PASS FOR CLOUD USER GOES HERE]!@localhost --deploy-as=root:[PASS FOR ROOT USER GOES HERE]
#Complete CS management setup
cloudstack-setup-management

#Install the NFS server on the CS management server and setup both primary and secondary mounts
sudo apt-get install nfs-kernel-server
mkdir -p /export/primary
mkdir -p /export/secondary

#Add the two NFS mounts to the NFS /etc/exports file
sudo vi /etc/exports
/export/primary  *(rw,async,no_root_squash,no_subtree_check)
/export/secondary  *(rw,async,no_root_squash,no_subtree_check)
exportfs -a

#Edit Ubuntu config files to enable the NFS ports
#LOCKD_TCPPORT=32803
#LOCKD_UDPPORT=32769
#MOUNTD_PORT=892
#RQUOTAD_PORT=875
#STATD_PORT=662
#STATD_OUTGOING_PORT=2020
sudo vi /etc/default/nfs-kernel-server
sudo vi /etc/default/nfs-common
sudo vi /etc/default/quotas
sudo vi /etc/sysctl.conf

#Configure IPTables rules in Ubuntu
#Network notation should be A.B.C.D/mask
sudo iptables -A INPUT -m conntrack --ctstate ESTABLISHED,RELATED -j ACCEPT
sudo iptables -A INPUT -s [YOUR NETWORK GOES HERE] -m state --state NEW -p udp --dport 111 -j ACCEPT
sudo iptables -A INPUT -s [YOUR NETWORK GOES HERE] -m state --state NEW -p tcp --dport 111 -j ACCEPT
sudo iptables -A INPUT -s [YOUR NETWORK GOES HERE] -m state --state NEW -p tcp --dport 2049 -j ACCEPT
sudo iptables -A INPUT -s [YOUR NETWORK GOES HERE] -m state --state NEW -p tcp --dport 32803 -j ACCEPT
sudo iptables -A INPUT -s [YOUR NETWORK GOES HERE] -m state --state NEW -p udp --dport 32769 -j ACCEPT
sudo iptables -A INPUT -s [YOUR NETWORK GOES HERE] -m state --state NEW -p tcp --dport 892 -j ACCEPT
sudo iptables -A INPUT -s [YOUR NETWORK GOES HERE] -m state --state NEW -p udp --dport 892 -j ACCEPT
sudo iptables -A INPUT -s [YOUR NETWORK GOES HERE] -m state --state NEW -p tcp --dport 875 -j ACCEPT
sudo iptables -A INPUT -s [YOUR NETWORK GOES HERE] -m state --state NEW -p udp --dport 875 -j ACCEPT
sudo iptables -A INPUT -s [YOUR NETWORK GOES HERE] -m state --state NEW -p tcp --dport 662 -j ACCEPT
sudo iptables -A INPUT -s [YOUR NETWORK GOES HERE] -m state --state NEW -p udp --dport 662 -j ACCEPT
sudo iptables-save

#Uncomment and add your domain name for NFSv4
sudo vi /etc/idmapd.conf

#At this point, reboot the CS management server
#After reboot verify that all relevant services are up and try to mount the primary and secondary NFS shares from another computer to verify that they are working ok.

#Download and install the required system VM templates
sudo mkdir /mnt/secondary
#For Hyper-V
sudo /usr/share/cloudstack-common/scripts/storage/secondary/cloud-install-sys-tmplt -m /mnt/secondary -u http://download.cloudstack.org/systemvm/4.16/systemvmtemplate-4.16.1-hyperv.vhd.zip -h hyperv -F
#For KVM
sudo /usr/share/cloudstack-common/scripts/storage/secondary/cloud-install-sys-tmplt -m /mnt/secondary -u http://download.cloudstack.org/systemvm/4.16/systemvmtemplate-4.16.1-kvm.qcow2.bz2 -h kvm -F

#Check the main CS db properties configuration file to ensure that all parameters are correct
sudo vi /etc/cloudstack/management/db.properties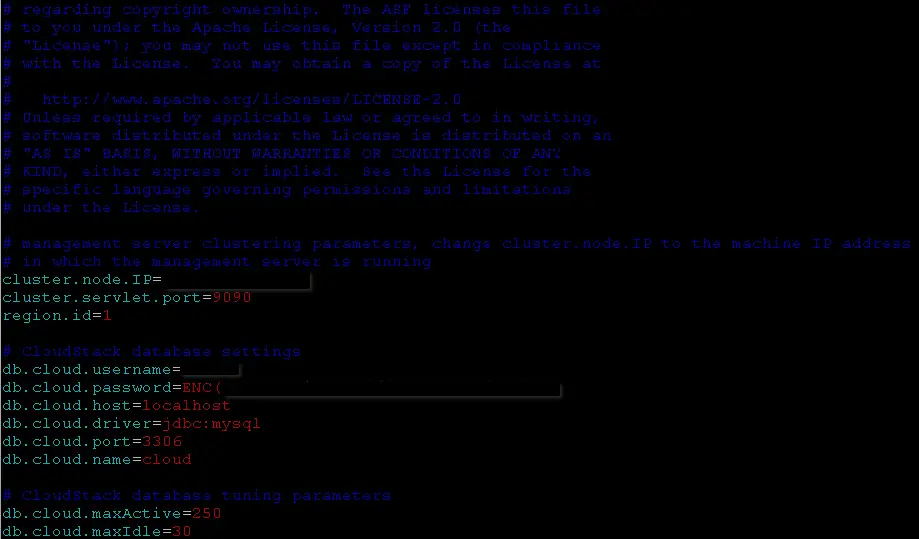
The CS management server installation is now complete and you should be able to perform initial login to the portal by navigating to http://[IP address of management server]:8080/client.
The first time default username and password of the admin user is:
admin - password

At this point you have completed your CS management server deployment (single management server) and you are ready to proceed with your hypervisor host configuration.
Configure your KVM hosts #
In our example there is a single KVM host but there may be more in a production environment. The procedure for installing a KVM Hypervisor Host is:
- Prepare the Operating System
- Install and configure libvirt
- Configure Security Policies (AppArmor and SELinux)
- Install and configure the Cloudstack Agent
This configuration section assumes that you have first deployed KVM on a supported Linux host, as per the following procedure: https://stefanos.cloud/kb/how-to-install-kvm-in-ubuntu-linux/
Details about the KVM host configuration for Cloudstack can be found at: https://docs.cloudstack.apache.org/en/4.16.1.0/installguide/hypervisor/kvm.html.
Configure the Cloudstack installation #
Follow the procedure at: https://docs.cloudstack.apache.org/en/4.16.1.0/installguide/configuration.html#configuring-your-cloudstack-installation.
As per the official Cloudstack documentation, to provision or scale your Cloudstack cloud infrastructure, the following steps must be carried out.
- Define regions (optional). See Adding Regions (optional).
- Add a zone to the region. See Adding a Zone.
- Add more pods to the zone (optional). See Adding a Pod.
- Add more clusters to the pod (optional). See Adding a Cluster.
- Add more hosts to the cluster (optional). See Adding a Host.
- Add primary storage to the cluster. See Add Primary Storage.
- Add secondary storage to the zone. See Add Secondary Storage.
- Initialize and test the new cloud. See Initialize and Test.
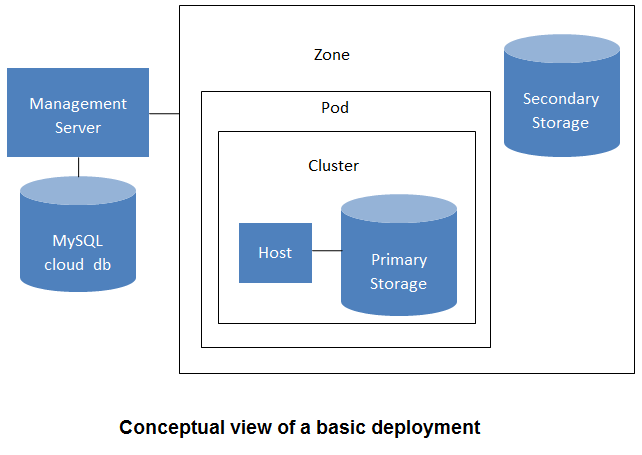
When you have finished these steps, you will have a deployment with the following basic structure:
Reference #
https://docs.cloudstack.apache.org/en/4.16.1.0/installguide/


