This article provides guidance on how to manage Microsoft 365 guest users. The article is also available in my podcast and Youtube channel.
View this article as a how-to video on Youtube.
Case #
You need to create, edit or delete Microsoft 365 guest users. In this how-to article, we will show you how to manage Microsoft 365 guest users via the Admin Center portal.
Solution #
To manage guest users of a Microsoft 365 tenant via the Admin Center portal, go through the following steps.
- Navigate with your Web browser to https://admin.microsoft.com.
- On the left pane, click on "Users", then click "Guest Users".
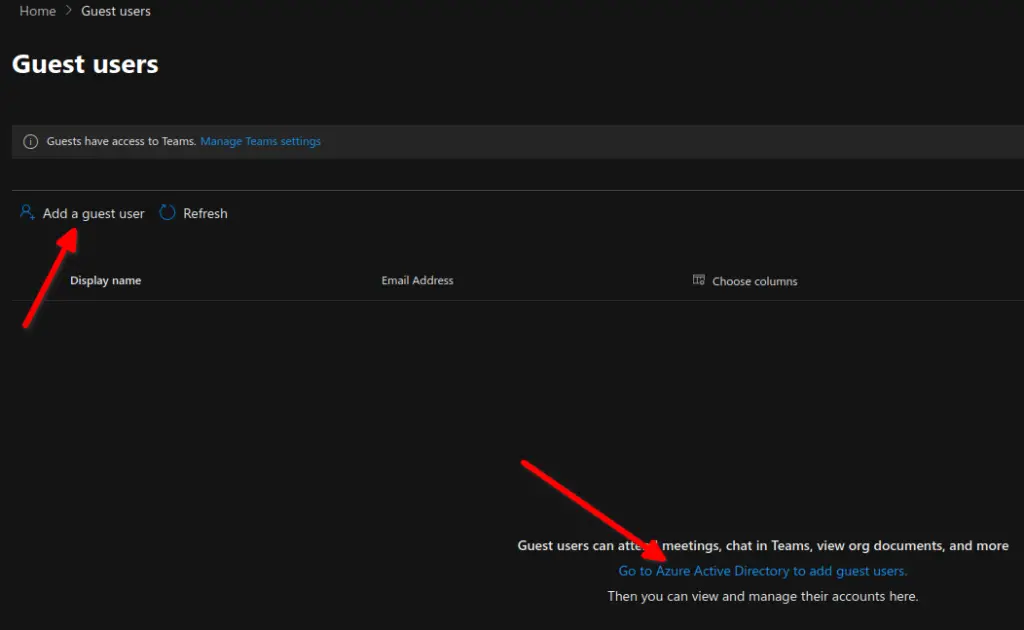
- On the "Guest Users" page, to create a new guest user, click on either the "Add a guest user" link on the top of the page or click on "Go to Azure Active Directory to add guest users" link at the bottom of the page. Both of these links will take you to the Azure Active Directory portal, which is located at https://aad.portal.azure.com.
- On the "New user" page in the Microsoft Azure portal, you must choose to either "Create user" or "Invite user". If you choose the "Create user" option, this will create a new user in your organization, which will have a login address with format username@tenantdomain,dot,com. If you choose the "Invite user" option, this will invite a new guest user to collaborate with your organization. The user will be emailed an email invitation which they can accept in order to begin collaborating. For the purpose of creating a guest user, you must choose the "Invite user" option.

- Fill-in all required fields under the "Identity", "Personal message", "Groups and roles", "Settings" and "Job info" sections. The "Identity" section has the following properties: Full name, email address, first name and last name.
- In the "Personal message section, you can optionally provided a welcome message to the new guest user or users.
- In the "Groups and roles" section, you can optionally make the guest user member of existing Azure AD groups and assign them with roles, besides the default "User" role. You should have pre-configured any custom Azure AD groups and Azure AD roles you wish to assign to the new guest users and be ready to assign them to the user at this stage.
- Under the "Settings" section, you can optionally choose to "Block sign in" of the guest user and set their "Usage location". This can be particularly useful if you need the guest user to participate in Microsoft Teams Web conferences and audio video conferences.
- Under the "Job info" section, you can optionally fill-in the job title, department, company name and manager name of the new guest user.
- When you have completed adding all the necessary guest user details, click on the "Invite" button to send the invitation to the guest user.

- The guest user will then receive the invitation by email which they will need to accept to be able to access your Microsoft 365 organization's applications, services and resources.
- If you need to invite guest users in bulk, navigate again to the "New user" page in the Azure Active Directory portal and click the "I want to invite guest users in bulk" link under the "Invite user" section on the top of the page. This will take you to a popup form on the right, which will allow you to download a csv template file.
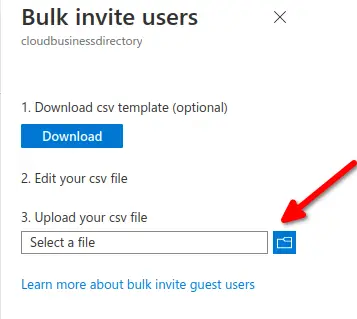
- You will have to edit the downloaded template csv file to add all your needed guest users and then upload the csv file to bulk invite the guests. After uploading and importing the csv template, the newly imported guest users will start showing up in the list of Azure AD users of the Azure AD portal. https://aad.portal.azure.com.
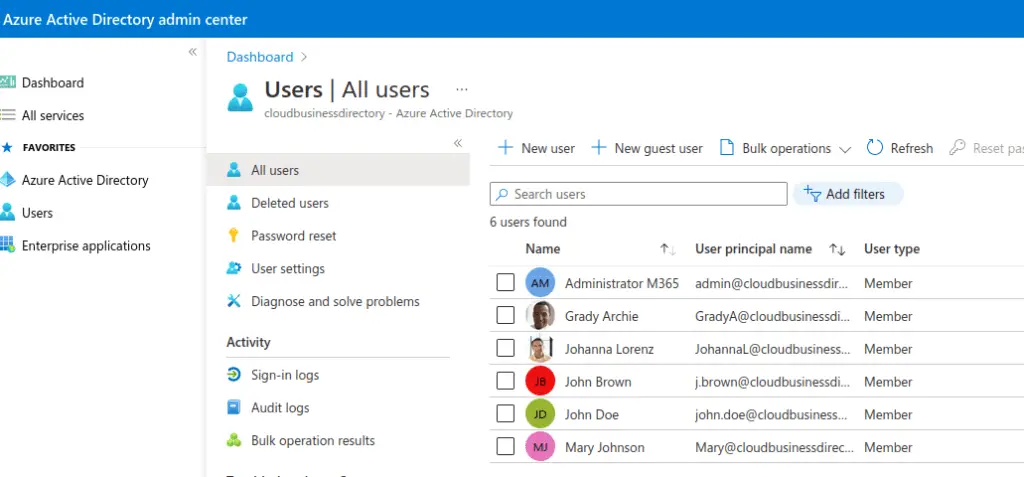
- If you need to edit or delete any of the existing Microsoft 365 guest users, you need to navigate to the Azure AD portal and go the users section. From there you can choose the guest user you wish to edit or delete and perform the necessary changes.


