Case #
There are many built-in Azure RBAC roles and Azure AD roles. There are various cases in which you need to create a custom RBAC role in Azure. This KB article provides guidance on how to create custom RBAC roles in Azure.
Solution #
The following list provides some of the most common and frequently used built-in Azure RBAC roles and Azure AD roles.
Azure RBAC Roles:
- Owner: Provides full access to all resources, including the ability to delegate access to others.
- Contributor: Allows managing all resources, but can't grant access to others.
- Reader: Provides read-only access to resources.
- User Access Administrator: Lets you manage user access to Azure resources.
- Security Administrator: Grants permissions to manage security-related aspects, such as managing security policies and configuring security features.
- Network Contributor: Allows managing networks, including virtual networks and their subnets.
- Network Security Contributor: Grants permissions to manage network security groups, application gateways, and other network-related resources.
- Storage Account Contributor: Enables managing storage accounts and their associated resources.
- Virtual Machine Contributor: Provides permissions to manage virtual machines.
- SQL Server Contributor: Allows managing SQL servers and databases.
- Application Insights Component Contributor: Grants permissions to manage Application Insights components.
- Log Analytics Contributor: Enables managing Log Analytics workspaces and data.
- Website Contributor: Provides permissions to manage Azure App Service resources, such as web apps and deployment slots.
Azure AD Roles:
- Global Administrator: Has full administrative access to the entire Azure AD directory.
- User Administrator: Allows managing user accounts, including password resets and user group management.
- Application Administrator: Grants permissions to manage application registrations in Azure AD.
- Device Administrator: Enables managing devices registered in Azure AD.
- Authentication Administrator: Provides permissions to configure authentication methods and settings.
- Helpdesk Administrator: Allows resetting passwords and managing support tickets on behalf of users.
- Security Administrator: Grants permissions to manage security-related aspects of Azure AD, such as conditional access policies and authentication methods.
- Application Developer: Provides permissions to develop and manage applications in Azure AD.
- Application User Administrator: Allows managing user access to applications.
- Compliance Administrator: Enables managing compliance-related tasks, such as data loss prevention policies and eDiscovery.
- Exchange Administrator: Grants permissions to manage Exchange Online services.
- SharePoint Administrator: Allows managing SharePoint Online services.
Please note that this is not an exhaustive list, and there are additional Azure AD roles available depending on the services and configurations in your Azure environment. It's always recommended to review the official Azure documentation for the most accurate and up-to-date information on RBAC roles and Azure AD roles.
To create custom RBAC roles in Azure, carry out the following steps. Bear in mind that to create custom roles, your organization/tenant needs Azure AD Premium P1 or P2 licenses for your users.
- Sign in to the Azure portal. Go to the Azure portal (https://portal.azure.com) and sign in with your Azure account credentials.
- Navigate to the Azure Active Directory (AAD) blade. Click on the "Azure Active Directory" option in the left-hand menu to navigate to the Azure AD blade.
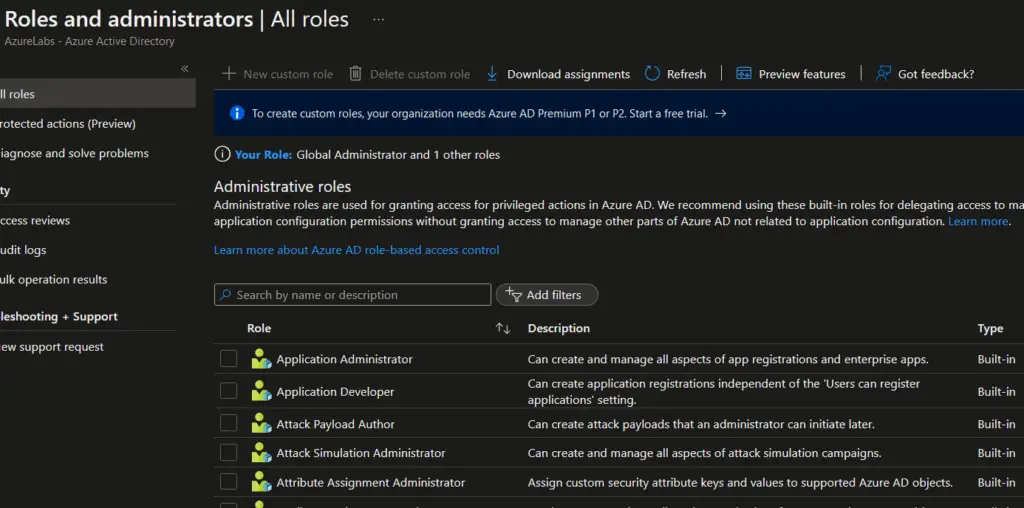
- Access the Roles and administrators section. In the Azure AD blade, click on "Roles and administrators" under the "Security" section. This will open the Roles and administrators blade.
- Create a custom role. In the Roles and administrators blade, click on "New custom role" to start creating a new custom RBAC role.
- Provide basic information for the custom role. In the Custom role blade, provide the following information:
- Name: Enter a unique name for your custom role.
- Description: Optionally, provide a description to explain the purpose of the custom role.
- Define role permissions. In the Permissions tab of the Custom role blade, you can define the specific permissions for the custom role. You have two options: a. Add existing permissions: You can add existing Azure RBAC roles or Azure AD roles to your custom role by selecting them from the list. b. Create custom permissions: If the existing roles don't meet your requirements, you can create custom permissions by selecting specific actions and resources.
- Review and create the custom role. After defining the permissions, review the summary of your custom role in the Review tab. Ensure that all the details are accurate. If needed, you can go back to the previous tabs to make any changes.
- Create the custom role. Once you are satisfied with the configuration, click on the "Create" button to create the custom role. Azure will validate the role definition and create the custom role.
- Assign the custom role to users or groups. After creating the custom role, you can assign it to users or groups within your Azure environment. You can do this by navigating to the appropriate resource (such as a subscription or resource group), selecting the "Access control (IAM)" option, and then adding the user or group and assigning them the custom role you created.
At this point you have created a custom RBAC role in Azure and assigned it to users or groups as needed. Remember to regularly review and update your custom roles as your organizational and operational requirements evolve.


